
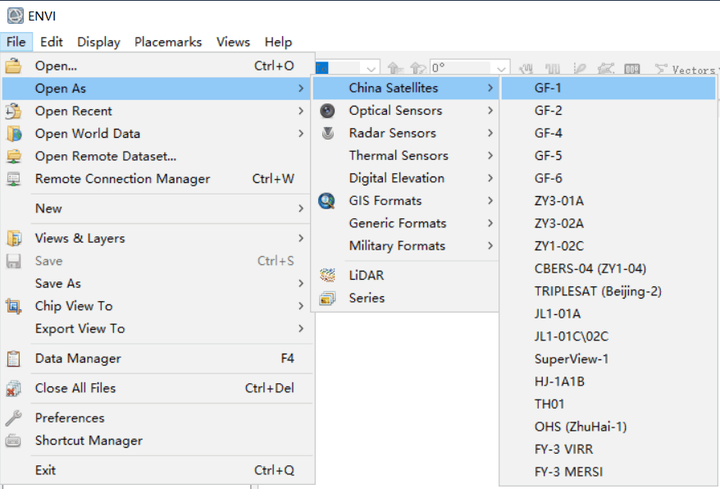
引言:高分一号(GF-1)卫星搭载了两台2m分辨率全色/8m分辨率多光谱相机(PMS),四台16m分辨率多光谱相机(WFV)。
处理流程:
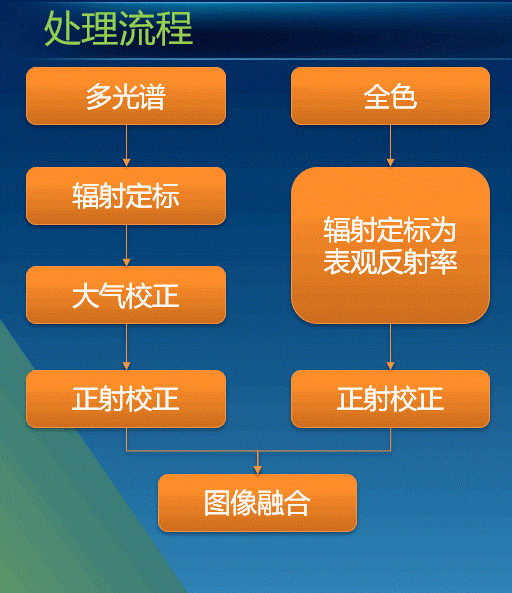
- 全色图像很难进行大气校正,所以一般在定量遥感中不使用全色图像。
- 本流程中包括了大气校正,如果不涉及到遥感定量方面的应用,可不进行大气校正,也就是只包括正射校正和图像融合。
(一)先安装两个需要的插件
将素材包中的…\常用ENVI功能扩展工具\植被增强工具envi_vegetation_enhance.sav;以及数据101-处理专题:高分一号PMS数据处理里面ENVI_China_Satellites_Support_V5.3_9文件拷贝到本地ENVI安装目录extensions中,重启ENVI
注:扩展工具也可以在中国资源卫星ENVI扩展工具商店下载
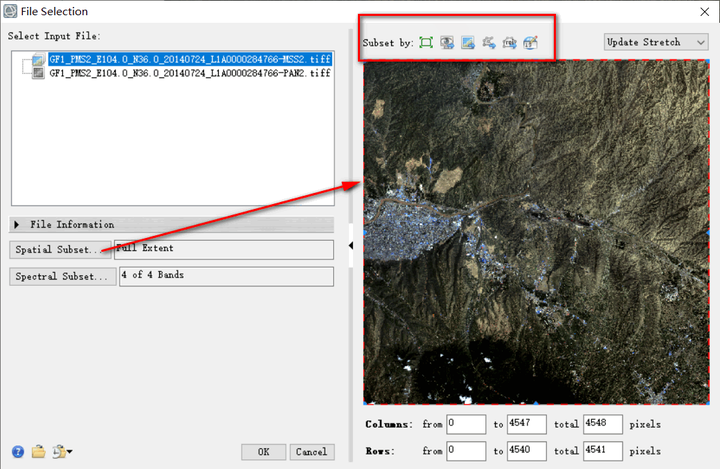
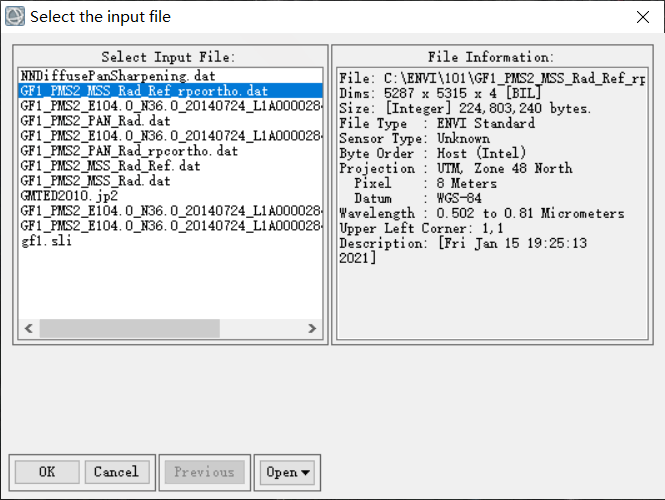
(二)打开数据并查看详细信息
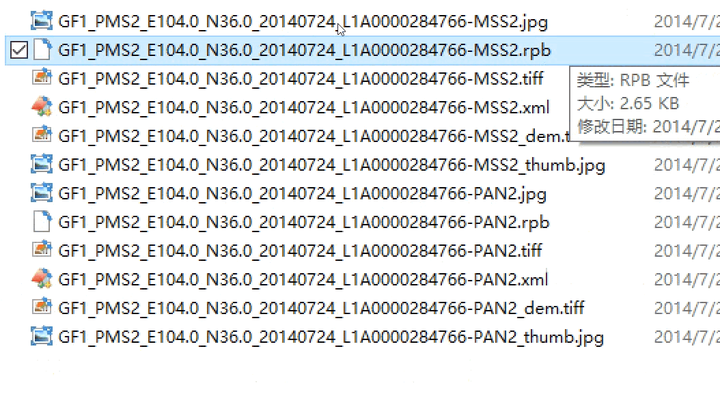
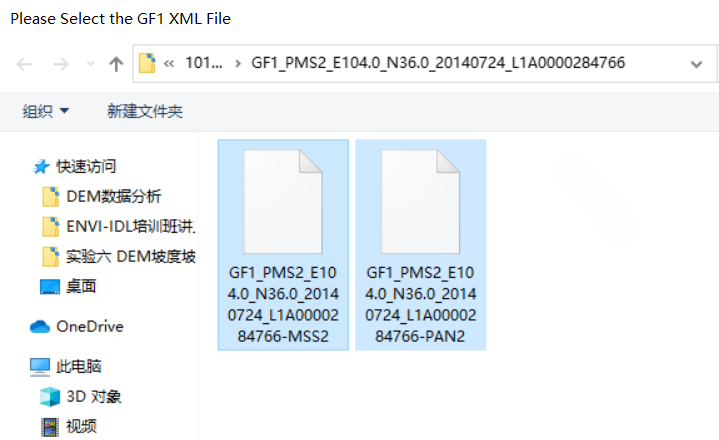
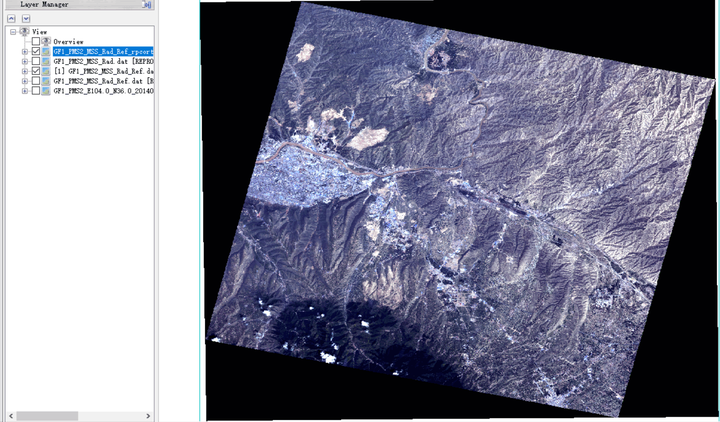
1)打开数据(查看解压的GF1号卫星PMS数据:分为MSS和PAN)
2)ENVI界面里面使用安装的扩展工具打开
3)查看打开的全色波段数据(2m分辨率)
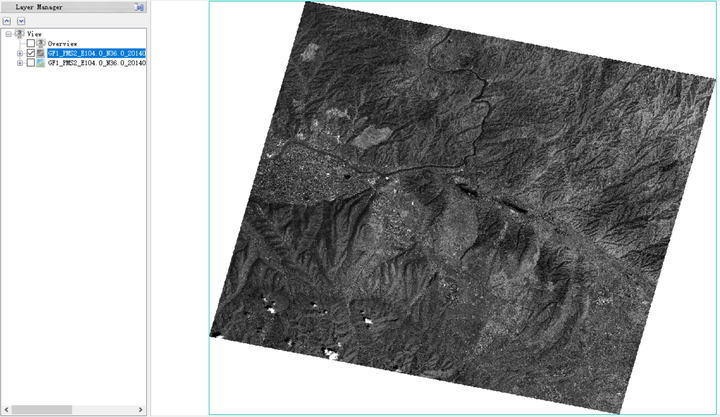
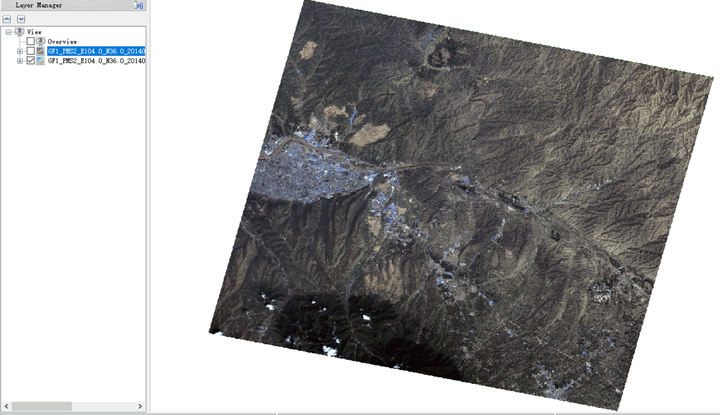
查看打开的多光谱波段数据(8m分辨率)
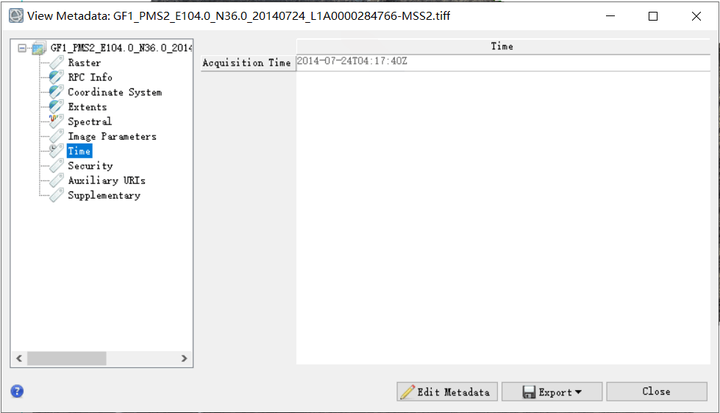
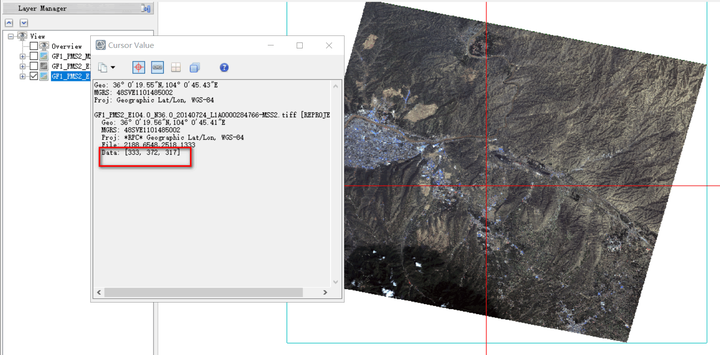
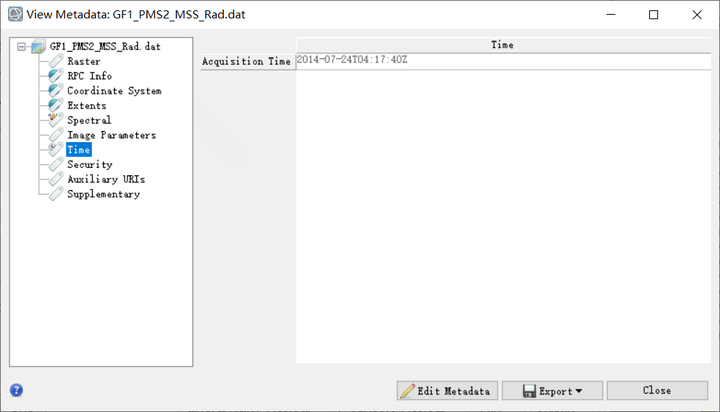
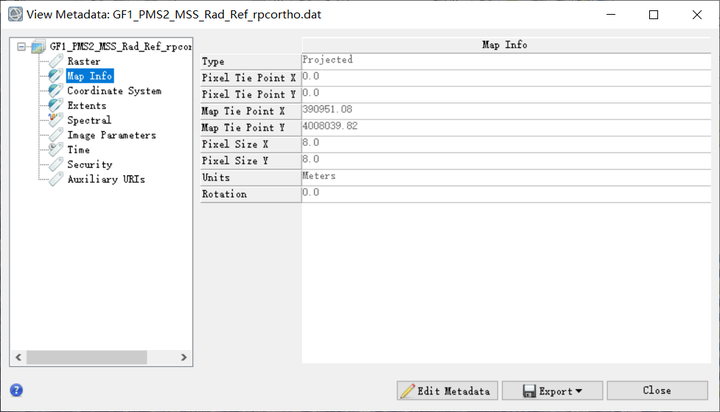
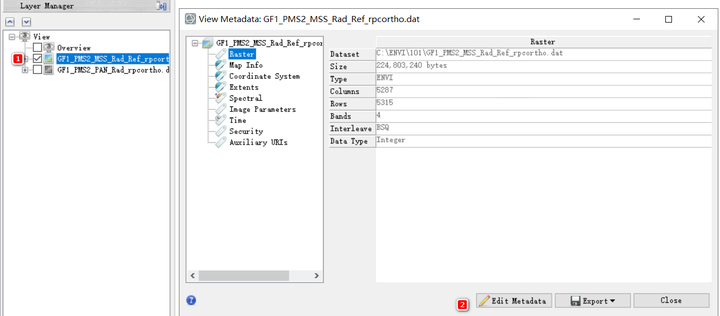
4)以多光谱数据为例查看浏览源信息
双击图层,或者鼠标右击,打开View Metadata(浏览源信息)
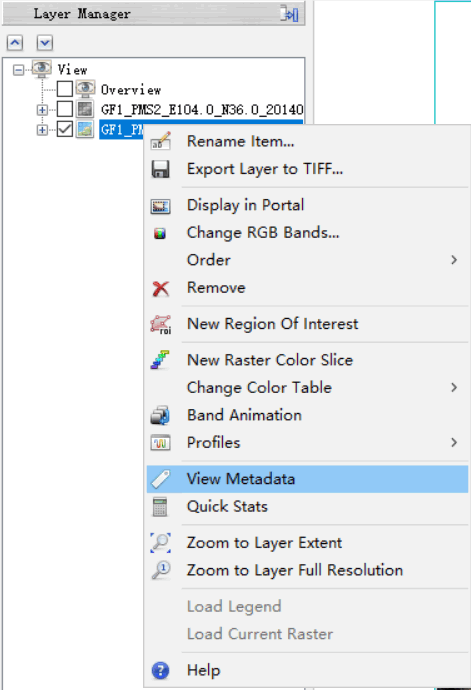
可以查看坐标系,时间等各种源信息
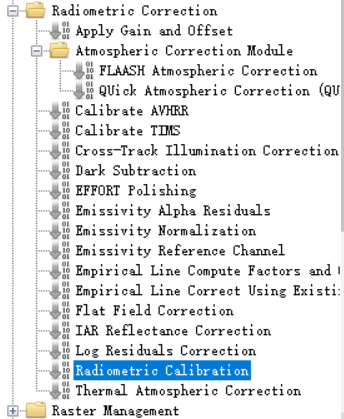
(三)多光谱大气校正——辐射定标
1)在Toolbox中,打开/Radiometric Correction/Radiometric Calibration,对多光谱图像辐射定标为辐射量度图像
辐射定标:DN值转化为辐射亮度值
原理:Rad=gain(增益)*DN(图像中的信息)+offset(偏移)
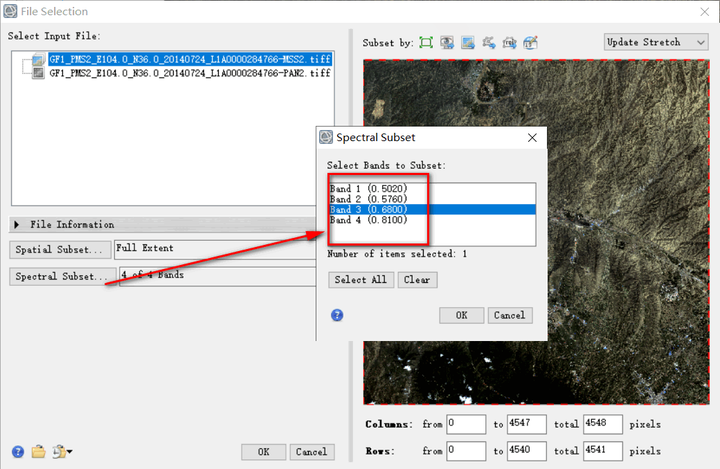
2)在工具框中选择多光谱数据
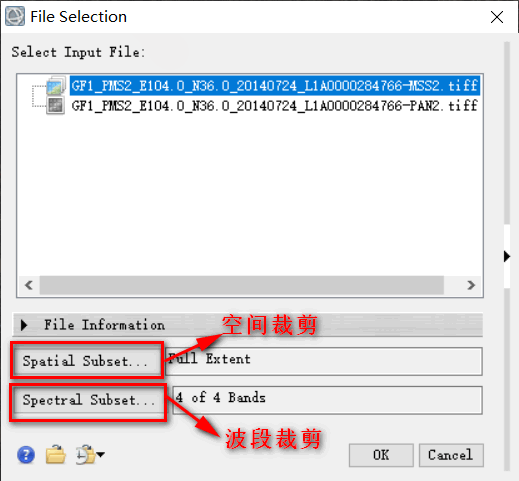
空间裁剪:可以自行选择裁剪所需区域
波段裁剪:可以自行选择裁剪区域的所需波段数目
3)打开辐射定标面板,进行设置
整个面板设置是为了后面的大气校正

点击Apply FLAASH ,选择存储路径,点击
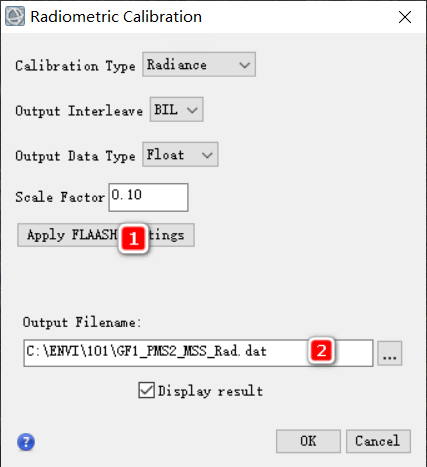
得到多光谱辐射定标的结果
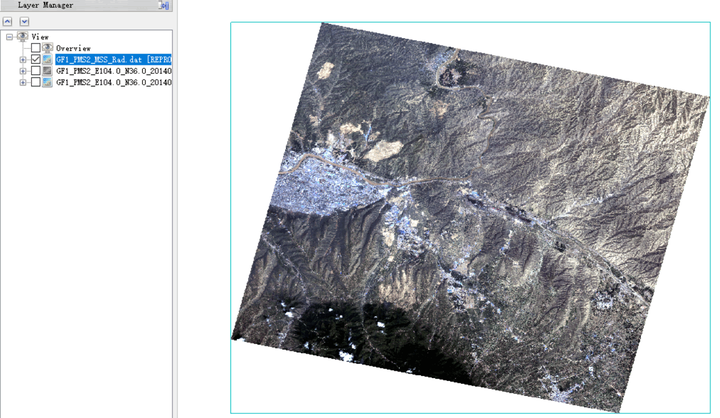
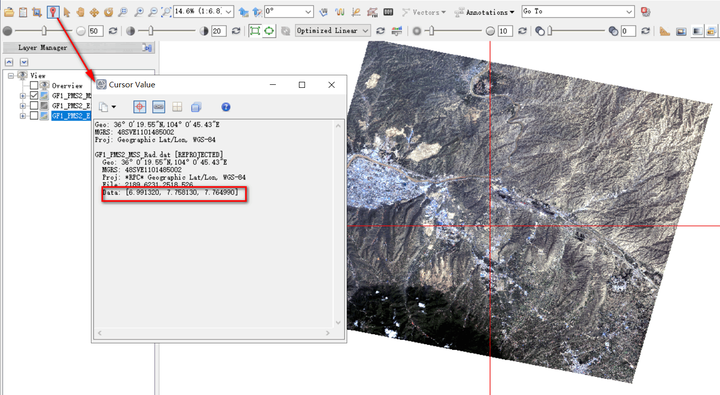
4)查看辐射定标的结果与原始多光谱信息的变化
即进行了一个线性变换
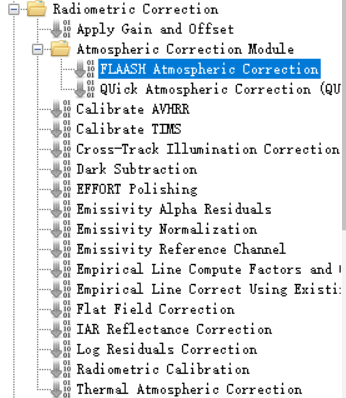
(四)多光谱大气校正——FLAASH大气校正
1)在Toolbox中,打开/Radiometric Correction/Atmospheric Correction Module/FLAASH Atmospheric Correction
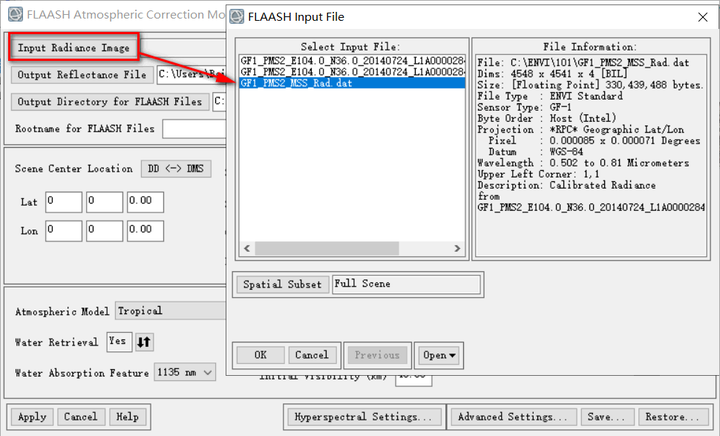
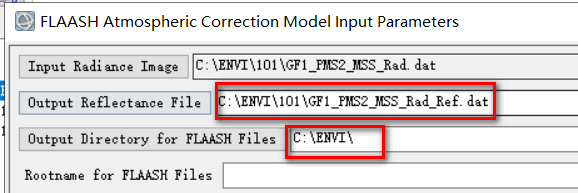
2)在大气校正面板中进行设置参数
a)输入辐射影像:进行辐射定标的多光谱影像
- 输出大气校正位置:GF1_PMS2_MSS_Dat_Ref.dat
- 输出临时文件位置:建议放在存储空间较大的非系统盘
因为在辐射定标时已经设置了单位,所以这里不用改,如果没有设置,这里应该填10

存储面板参数已经设置好
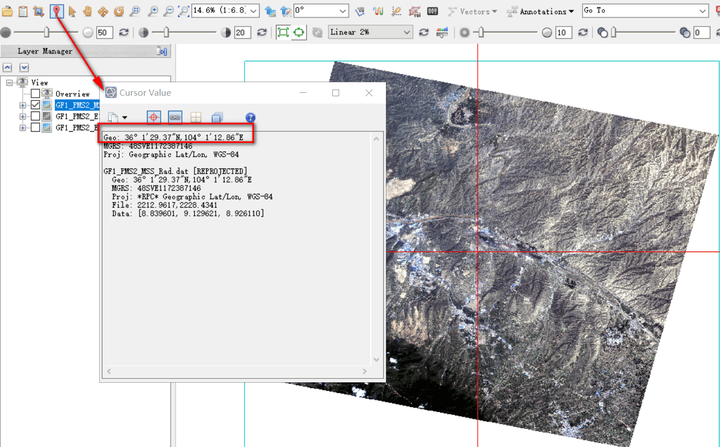
b)进行设置经纬度(在这里已经默认被系统识别)
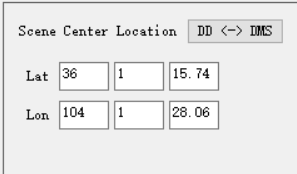
如果系统无法识别,可用识别工具打开,让红十字落在大致影像中心位置即可,读取消息框中的经纬度即可
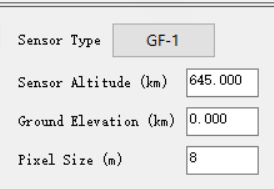
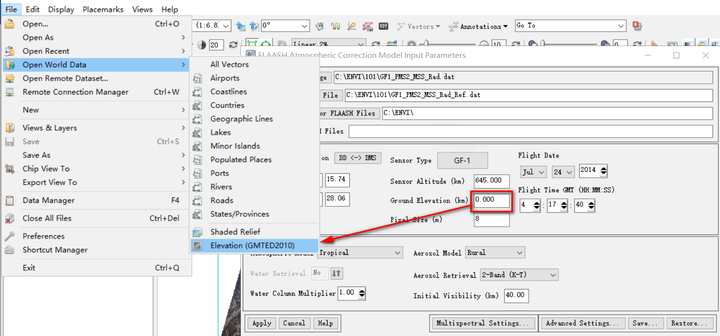
c)设置传感器类型、高度、海拔以及像元尺寸
这里传感器类型、高度、像元尺寸已经自动识别
海拔查询操作如下
打开Open World Data——Elevation
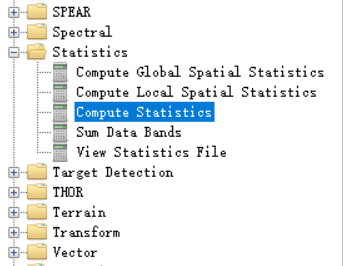
打开Statistics——Compute Statistics
点击Stats Subset——打开统计面板
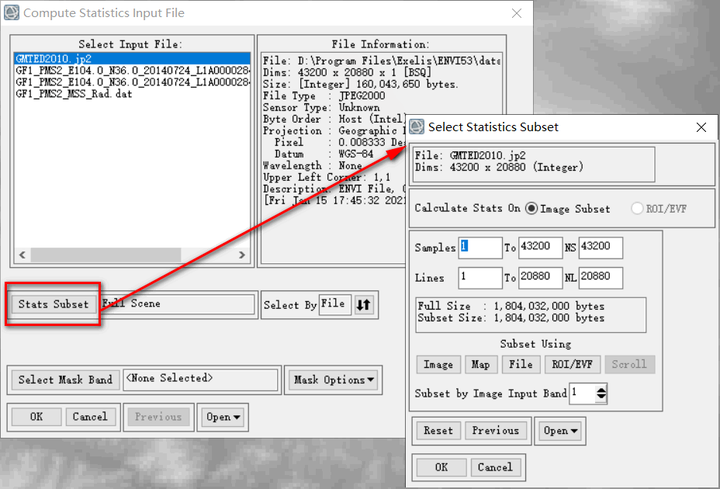
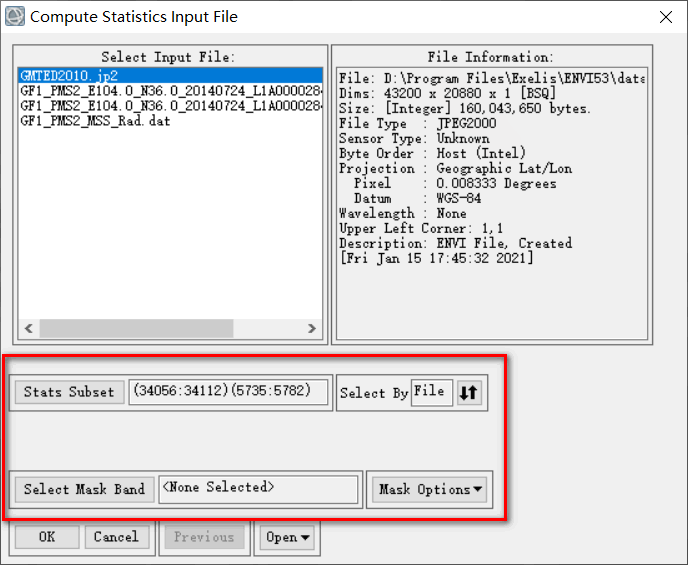
点击添加框中的File,选择辐射定标后的影像
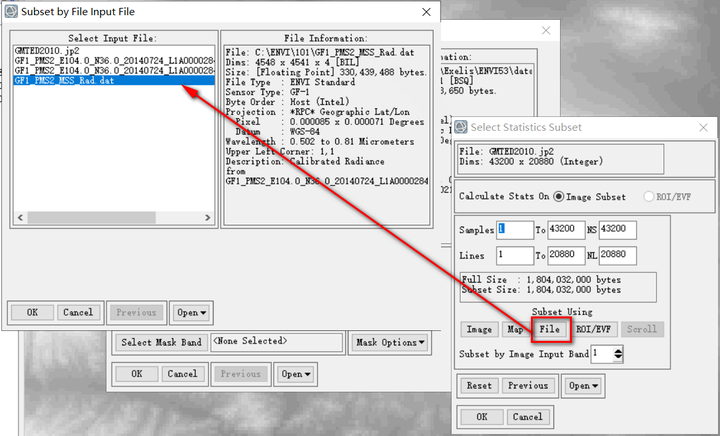
自动识别辐射定标的尺寸大小
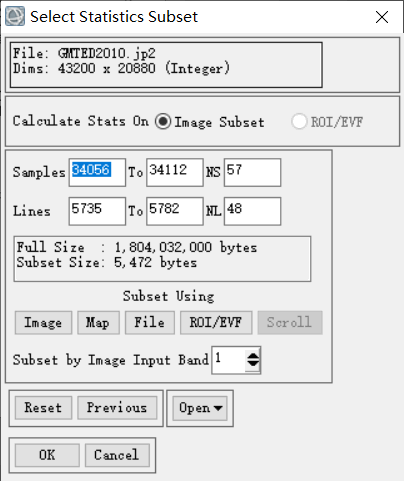
点击确定后,在Stats Subset中已经选择好统计的信息
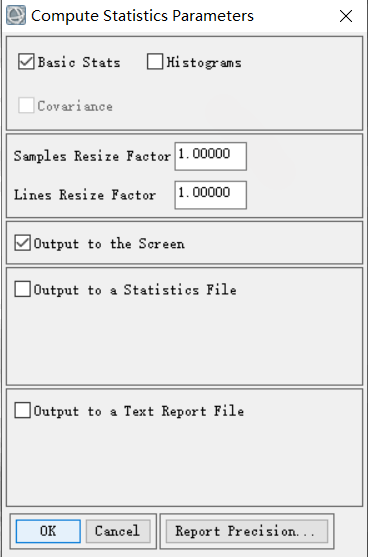
进行统计
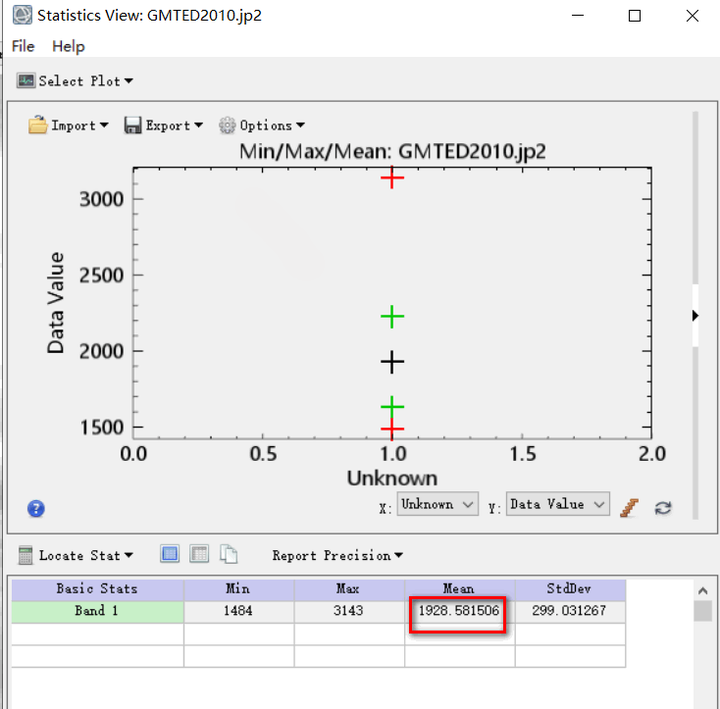
统计好信息,海拔大约为2km
d)进行设置时间
系统已经默认读取
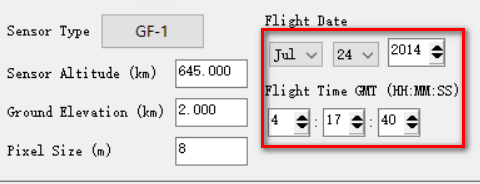
如果时间读取错误,可根据GF1号的详细信息进行查询
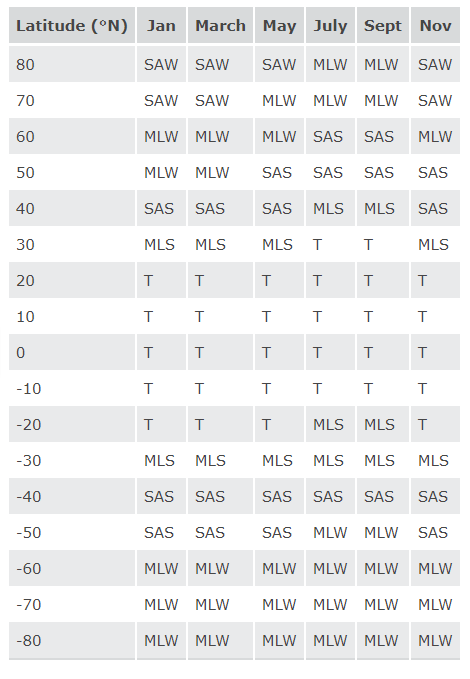
e)进行大气模型的选择
这里可以点击Help进行查询
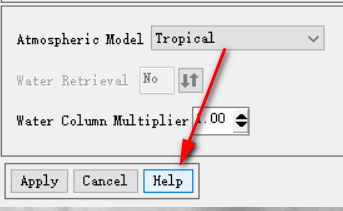
如下这张表,根据时间和经纬度可查询特定的大气模型
f)气溶胶模型设置
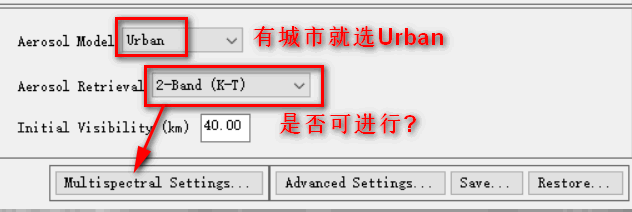
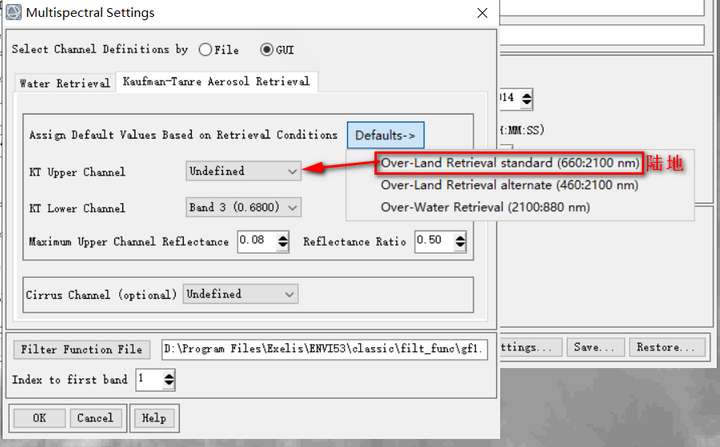
气溶胶繁衍参数:是否可进行KT变换——打开多光谱设置
Defaults中选择陆地,发现KT变换没有改变(陆地;海陆;海洋)
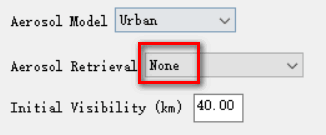
所以气溶胶繁衍参数——选择None
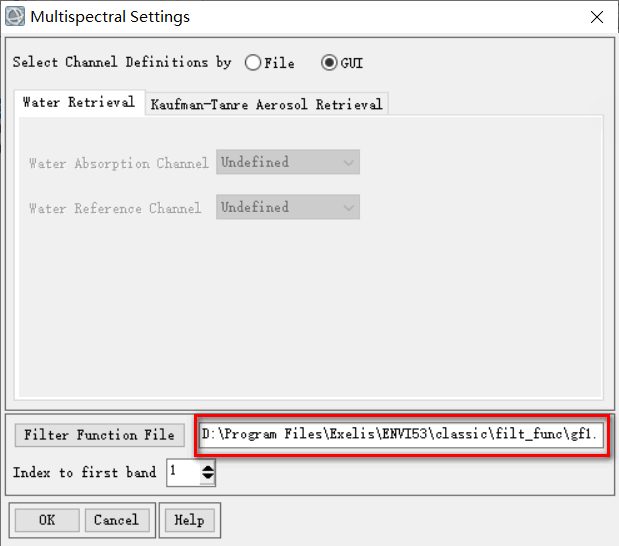
不同传感器具有不同的波谱文件(这里已经自行构建,但其它大多数传感器需要手动构建波谱文件函数)
g)进行高级设置
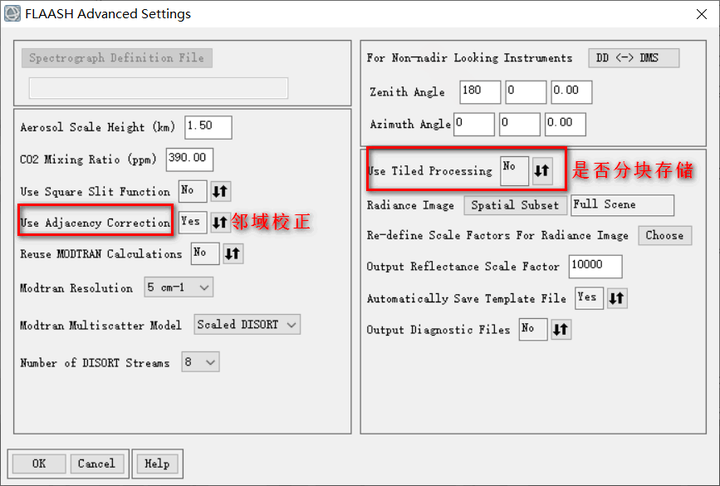
设置完成后点击Apply
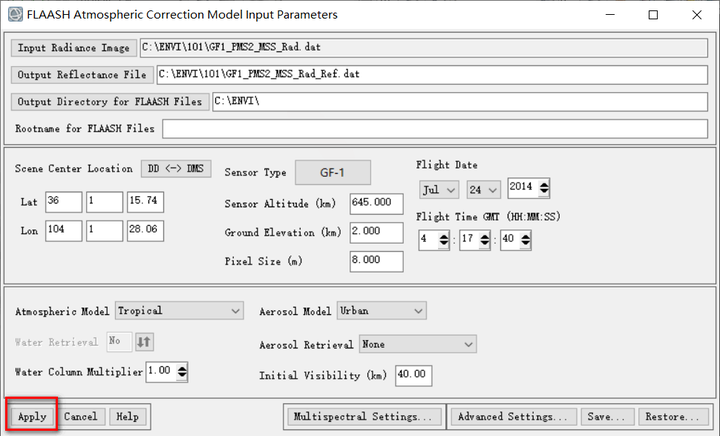
大气校正完成

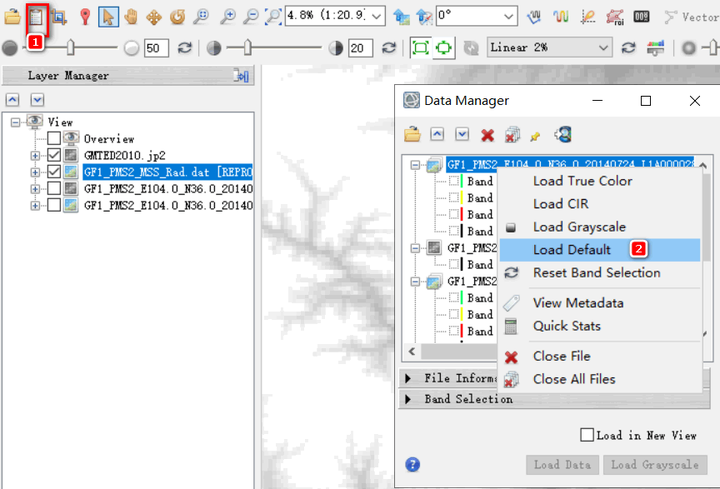
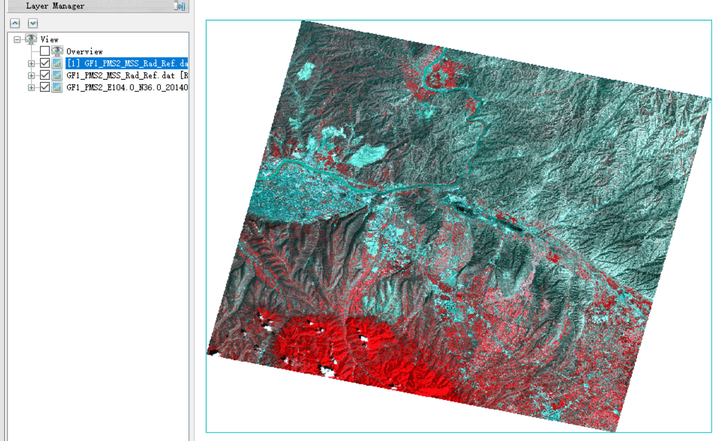
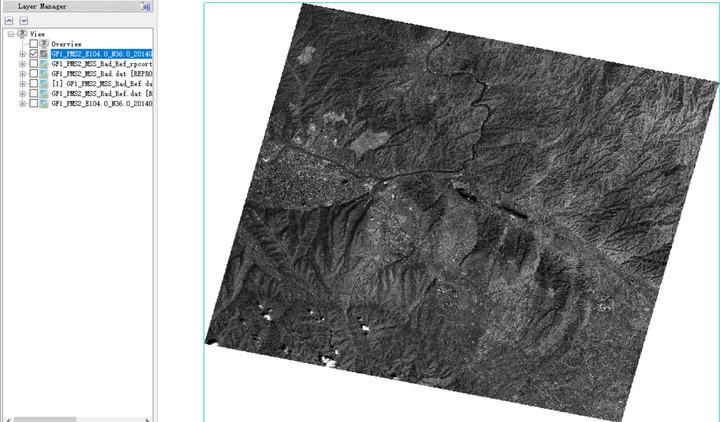
3)大气校正结果没有显示,将结果进行标准假彩色显示
4)进行查询对比光谱曲线

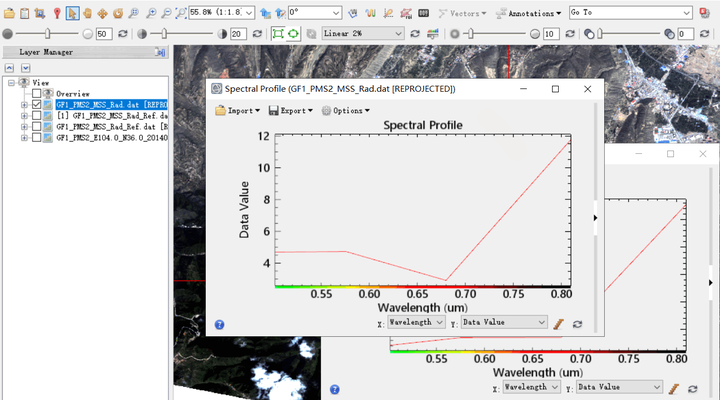
打开大气校正与辐射定标查看变化
蓝波段吸收率下降,绿波段有个反射波峰,而红光有个波谷后直线上升
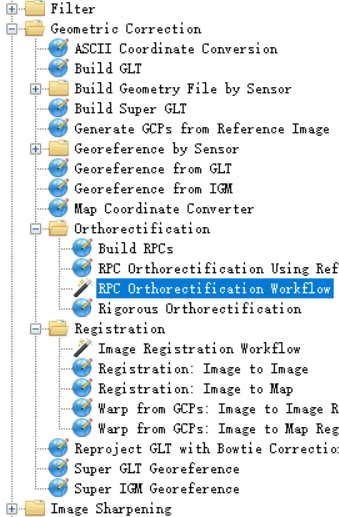
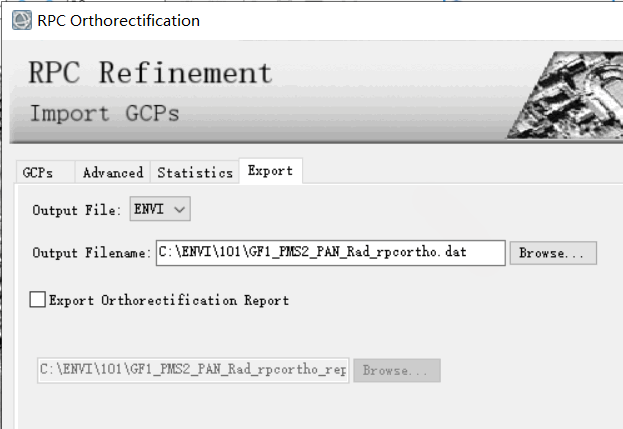
(五)多光谱正射校正
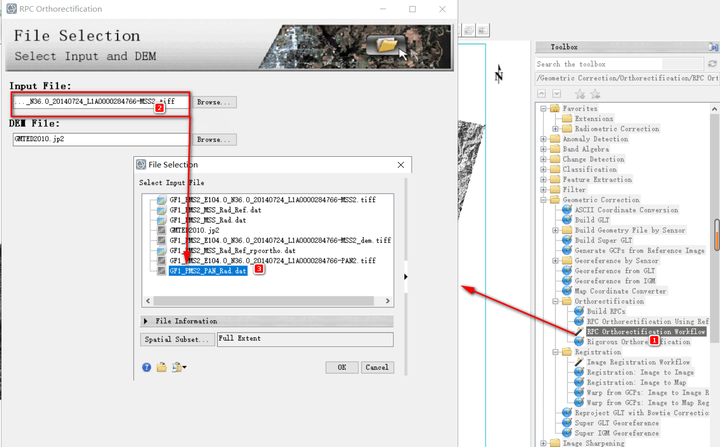
1)在Toolbox中,启动/Geometric Correction/Orthorectification/RPC Orthorectification Workflow工具
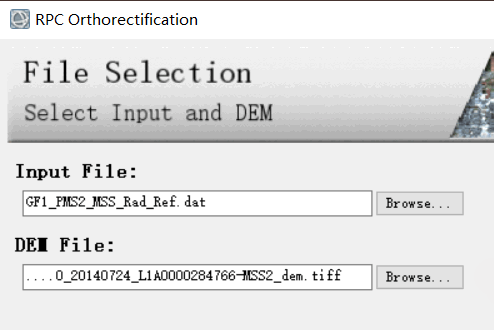
2)输入文件里面选择:大气校正后的影像
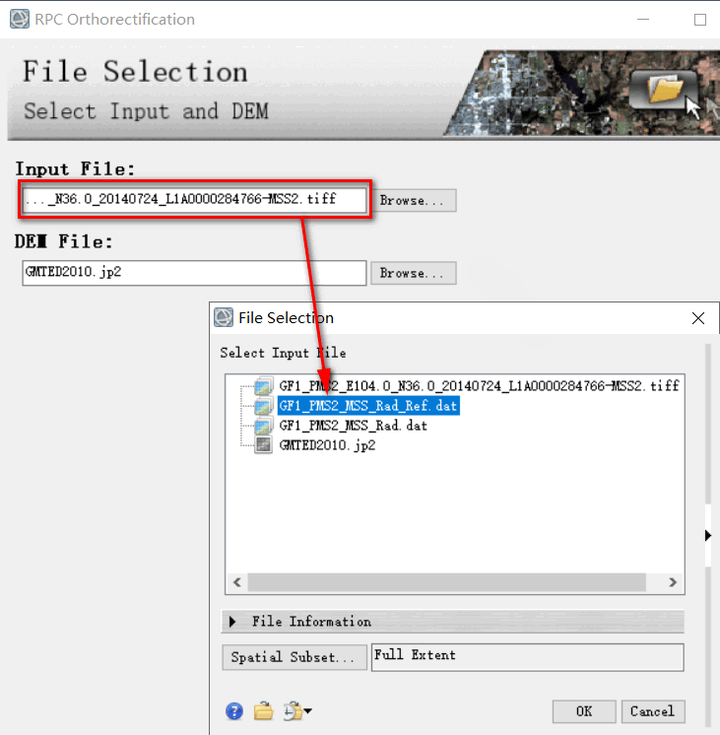
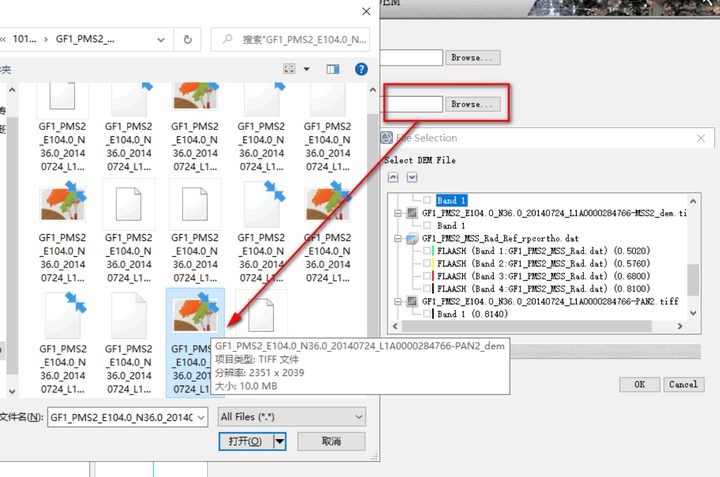
DEM File里面选择:文件数据自带的MSS的dem数据
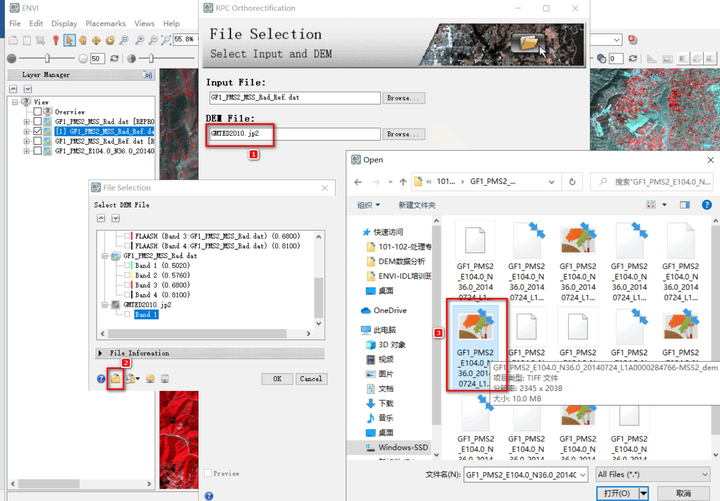
设置完成
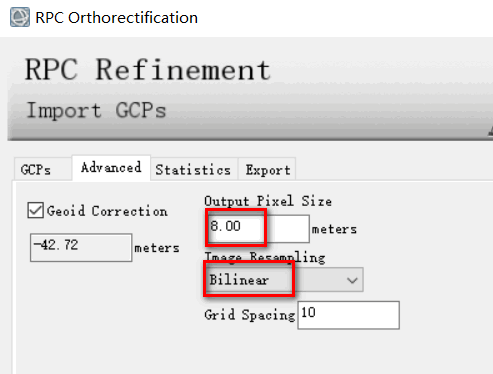
在下一步后的面板中Advanced里面现在输出分辨率8m,选择方法双线内插
设置输出路径:GF1_PMS2_MSS_Rad_Ref_rpcortho.dat
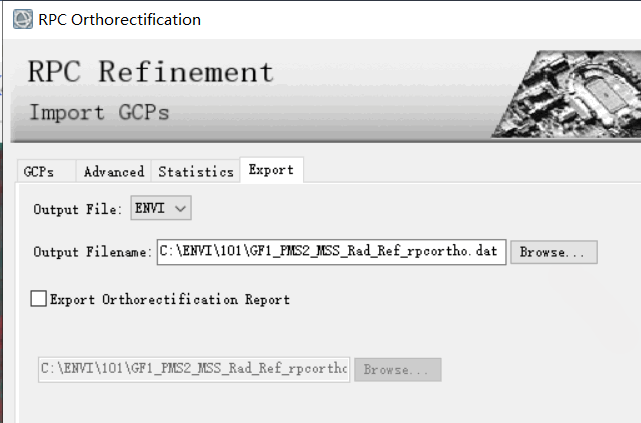
纠正完成
纠正完成后查看详细信息发现影像地图的坐标系统发生了变化
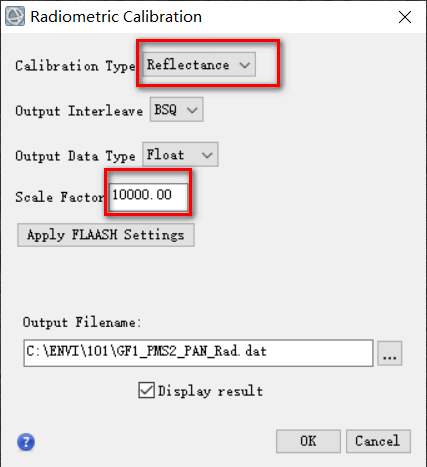
(六)全色大气校正——辐射定标
1)在Toolbox中,打开/Radiometric Correction/Radiometric Calibration
打开工具框选择全色波段影像
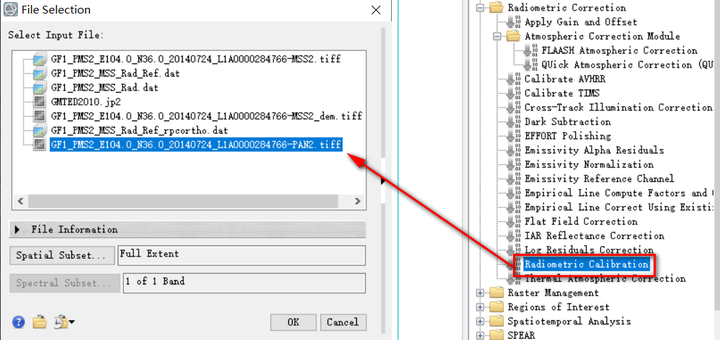
由于多光谱FLAASH大气校正的结果为扩大了10000倍的反射率数据,为了让融合图像效果好,需要将全色数据与多光谱数据的像元值变成一致。这里使用辐射定标工具将全色数据定标为大气表观反射率,并扩大10000倍
2)在辐射定标工具框中对全色波段进行设置
辐射定标工具将全色数据定标为大气表观反射率,并扩大10000倍
(七)全色波段——正射校正
1)在Toolbox中,启动/Geometric Correction/Orthorectification/RPC Orthorectification Workflow工具
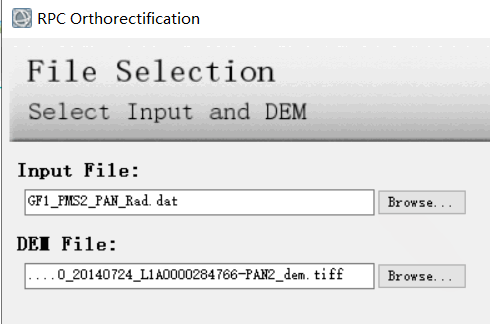
输入文件:辐射定标后的全色影像
DEM File:解压数据里面的PAN的dem
2)在下一步后的工具框中进行设置
Advanced:输出像元大小为2m,方法为双线内插

设置输出路径:FG1_PMS2_PAN_Rad_repcortho
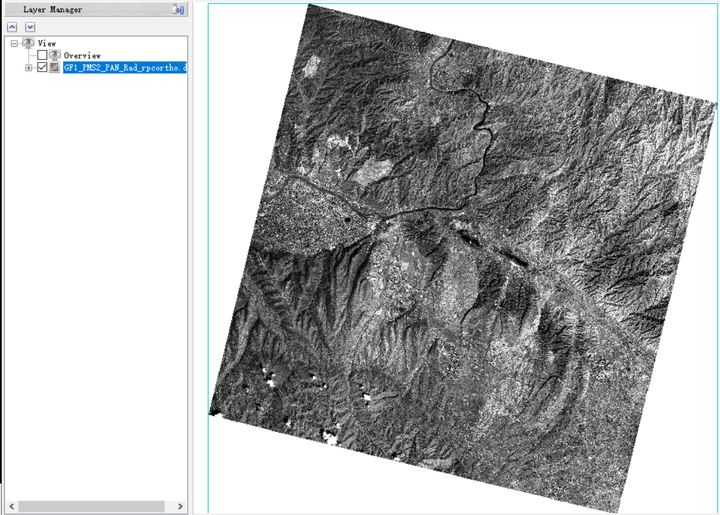
得到正射纠正后的影像

(八)图像融合
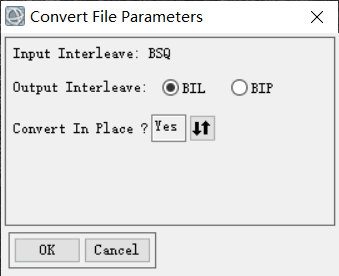
1)在Toolbox中,启动/Raster Management/Convert Interleave,将多光谱图像的储存顺序由BSQ转成BIP。提高融合速度。
2)查看影像发现有黑框,这会影响融合效果,当消除
双击图层打开消息信息。点击Edit Metadata(编辑源信息)
在工具框中点击Add,添加Data Ignore Value(数据忽略值)
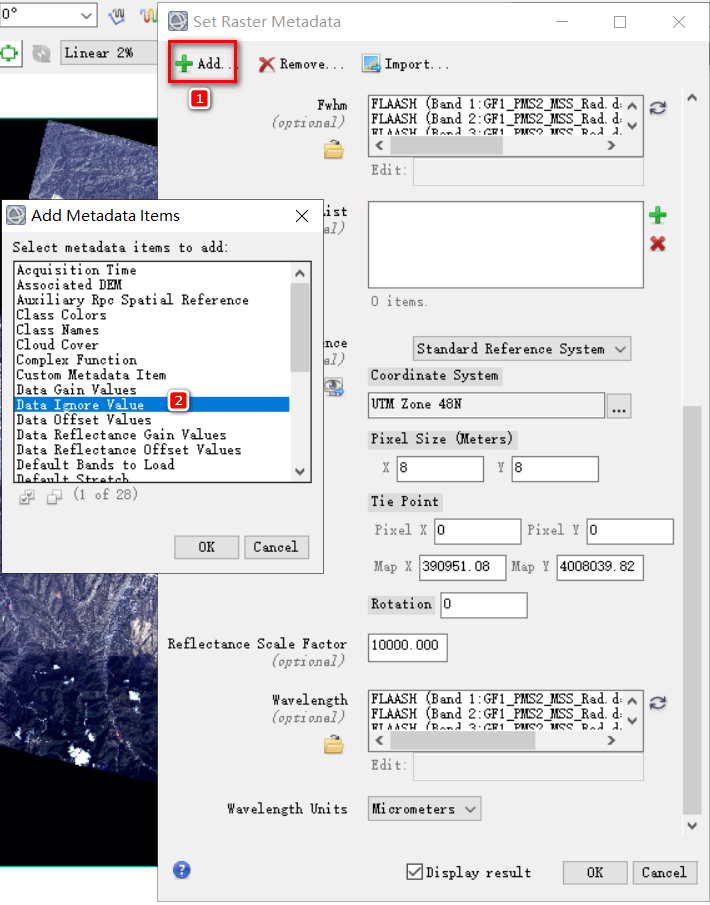
在Data Ignore Value里面设置0
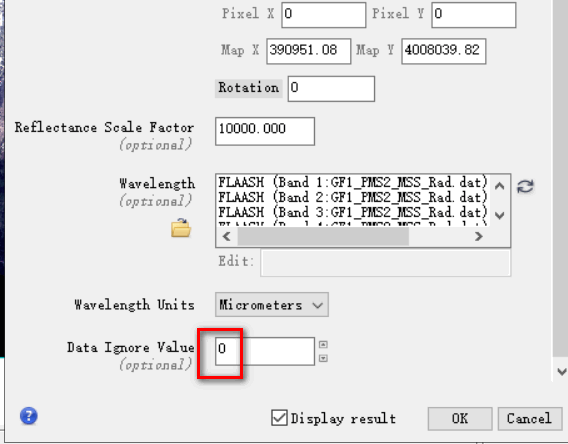
去除黑框完成
对全色影像采取同样的方法进行去除
3)转化数据格式
打开Convert Interleave,选择正射纠正后的多光谱影像
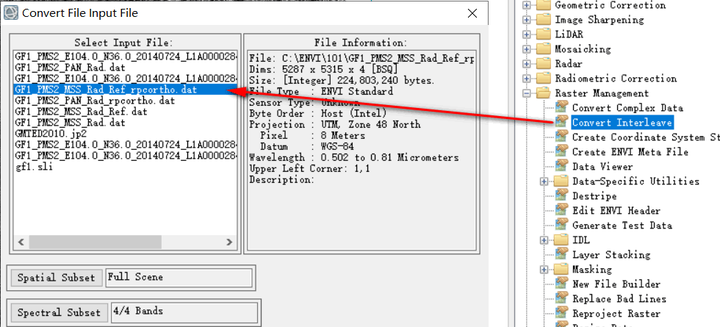
设置对话框参数
重新打开
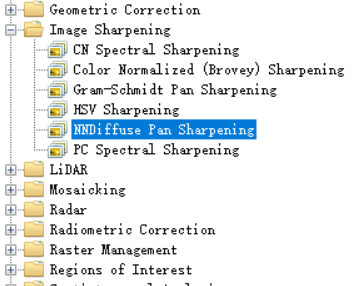
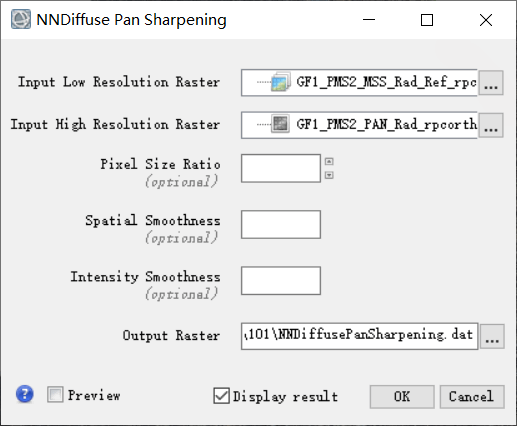
4)在Toolbox中,启动/Image Sharpening/NNDiffuse Pan Sharpening
在工具框中输入相应参数
低精度栅格:多光谱
高精度栅格:全色
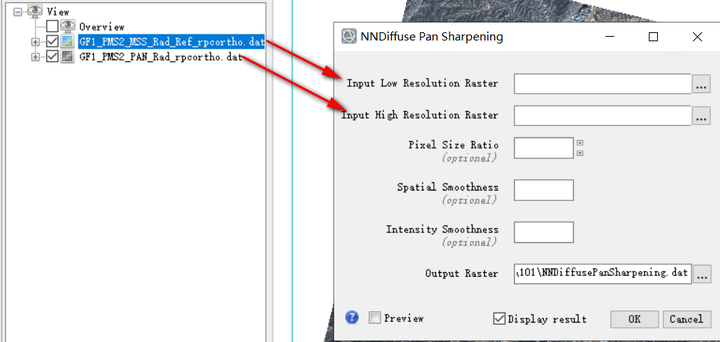
设置输出路径,保存
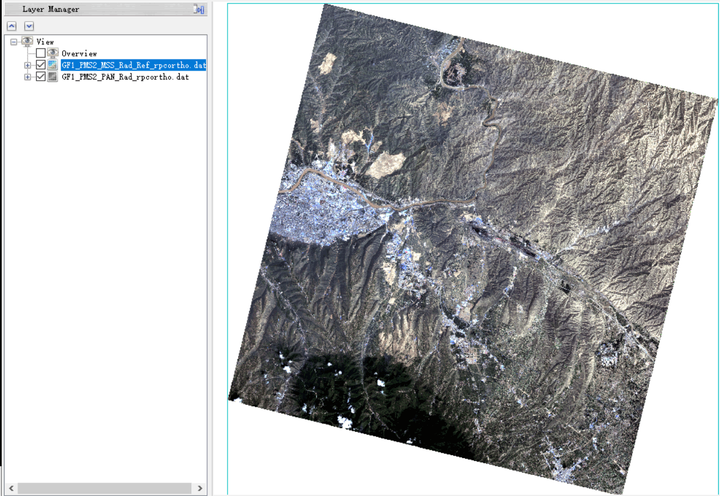
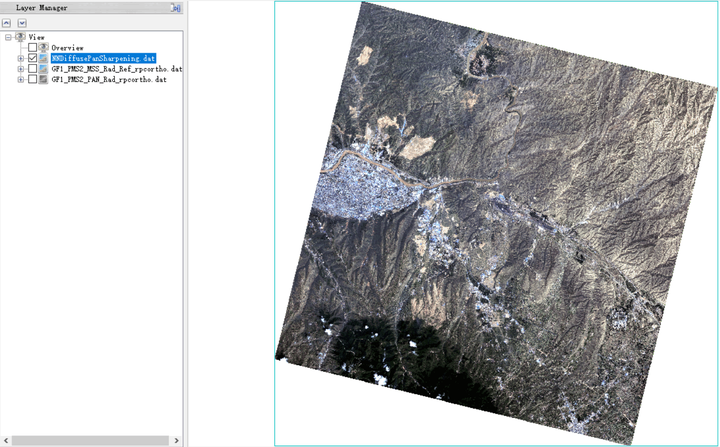
融合完成
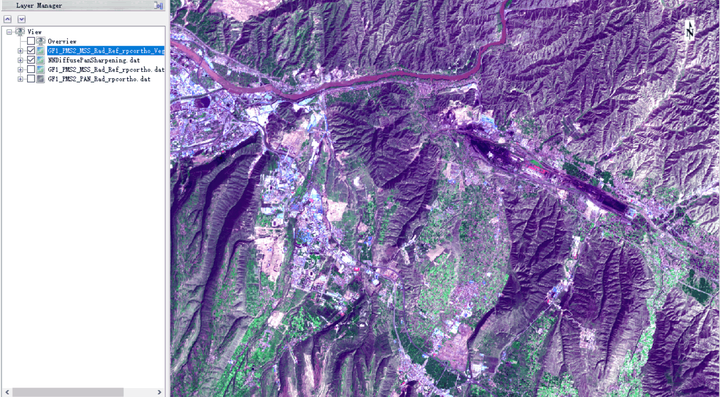
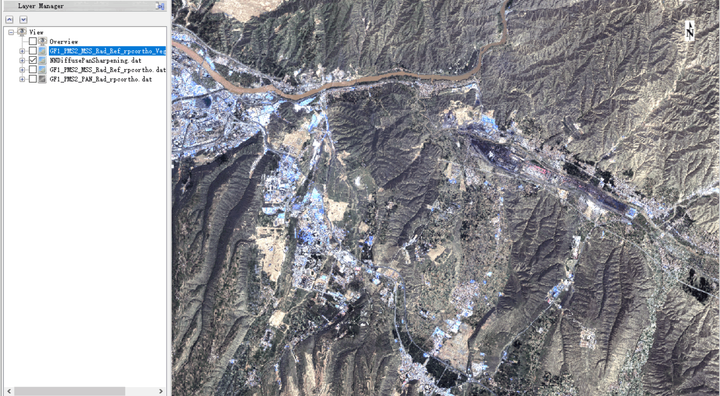
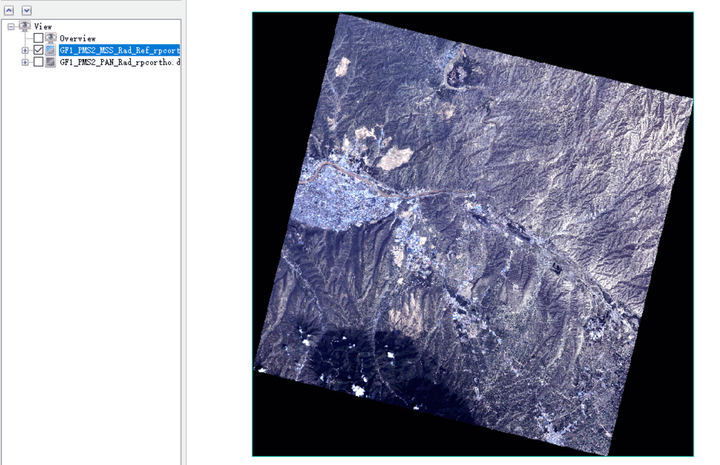
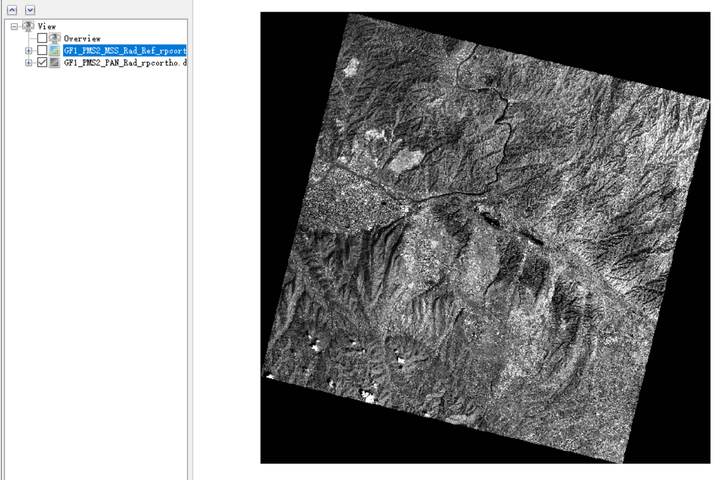
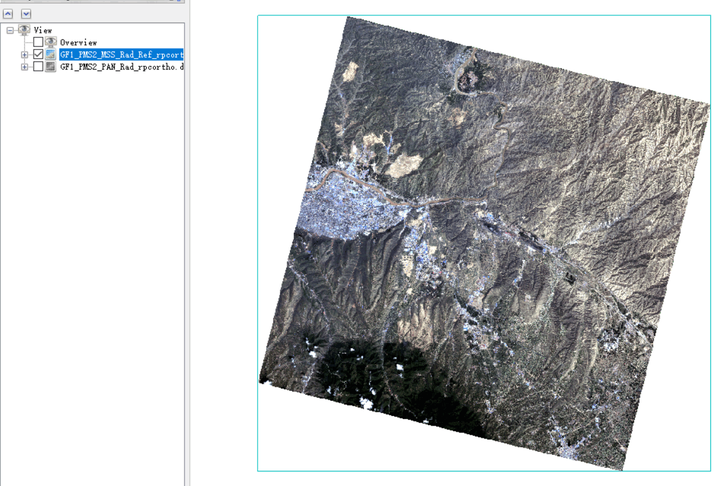
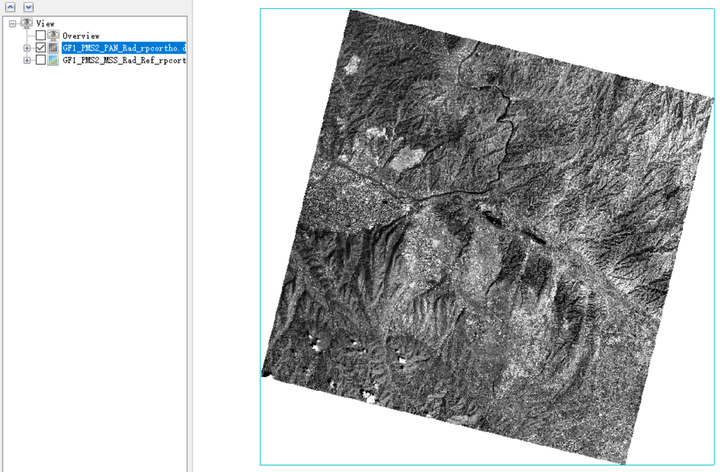
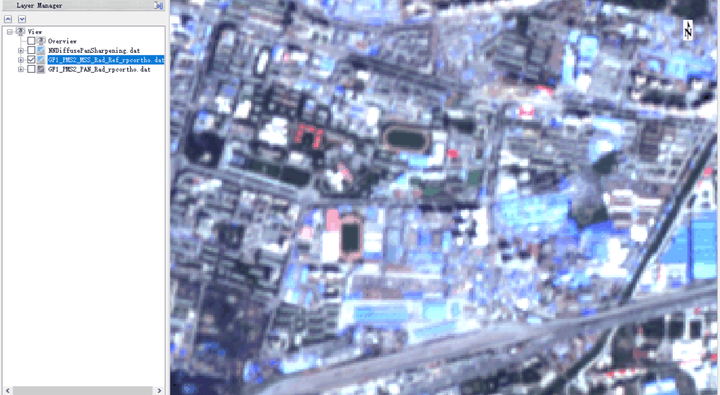
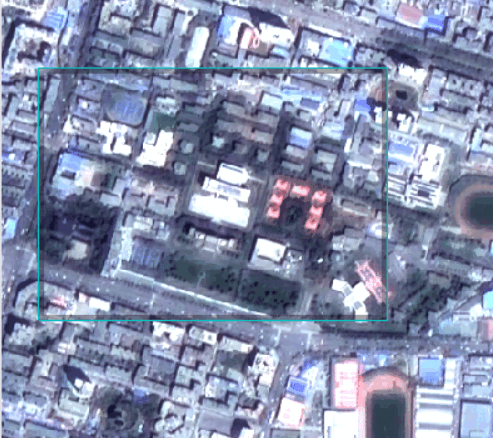
5)对正射纠正后的影像和融合的影像进行对比
正射纠正的影像
融合的影像
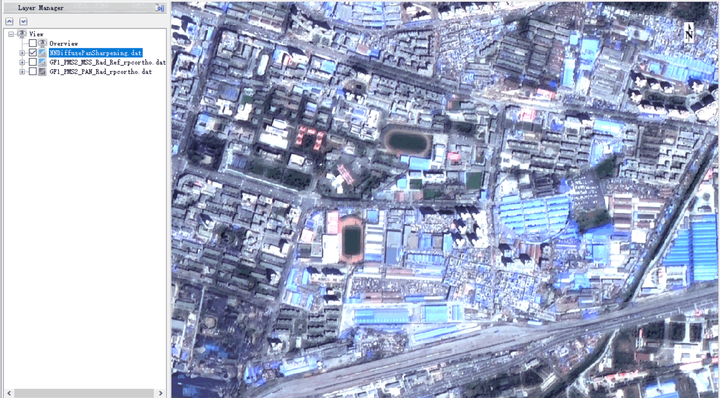
发现融合后的图像保留了多光谱与全色数据的优点,图像质量高
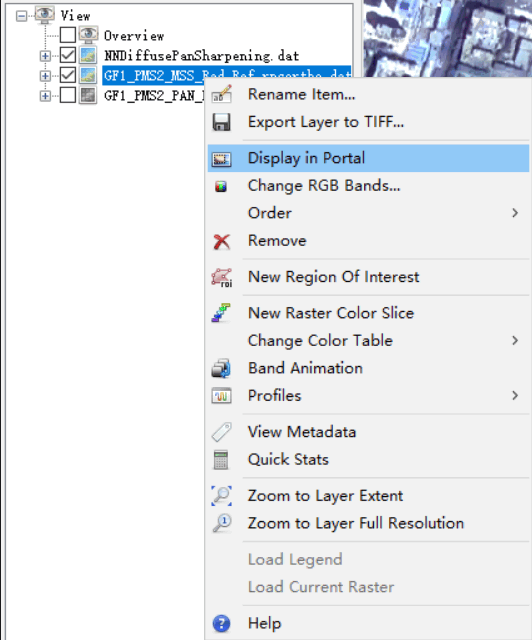
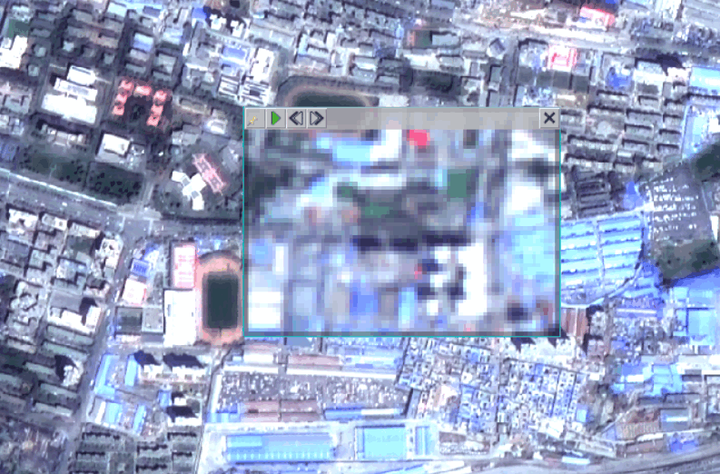
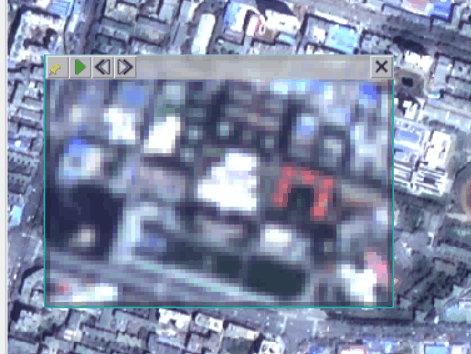
也可以通过查看工具进行比较查看
点击 多光谱正射纠正影像,打开Display in Portal
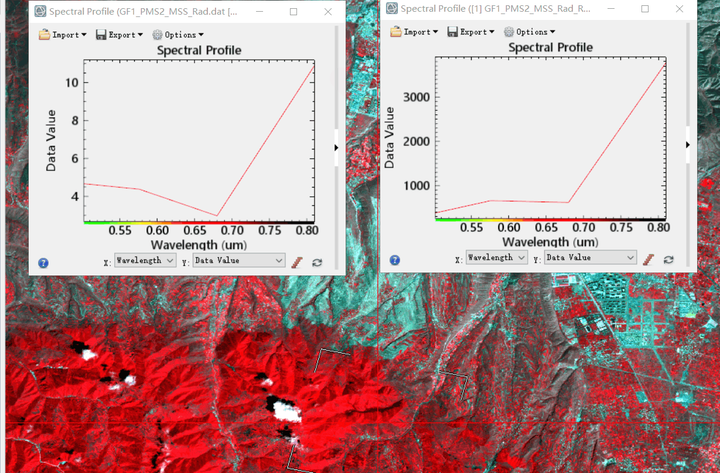
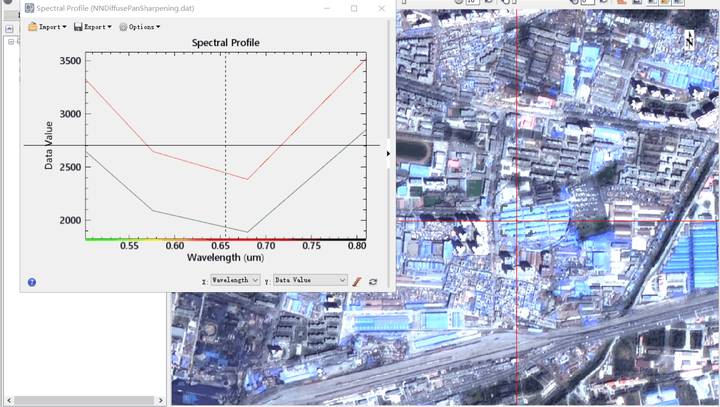
也可以通过波谱曲线查看
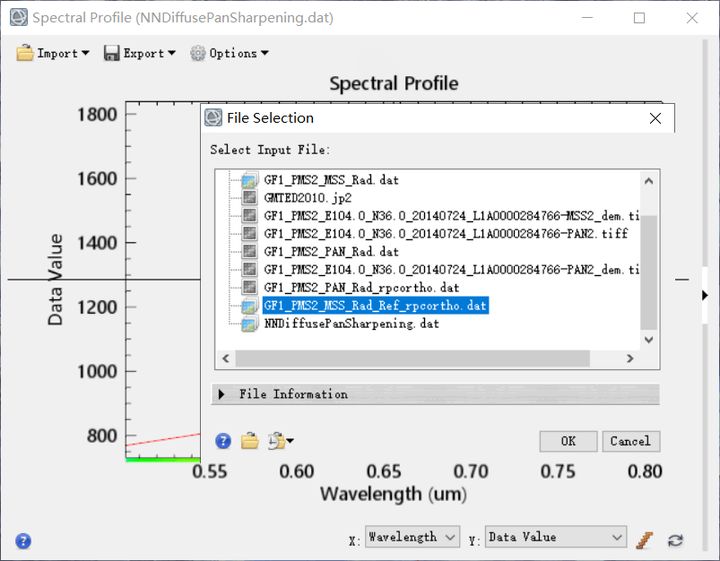
先打看融合图像的光谱曲线,然后点击Additional Profiles
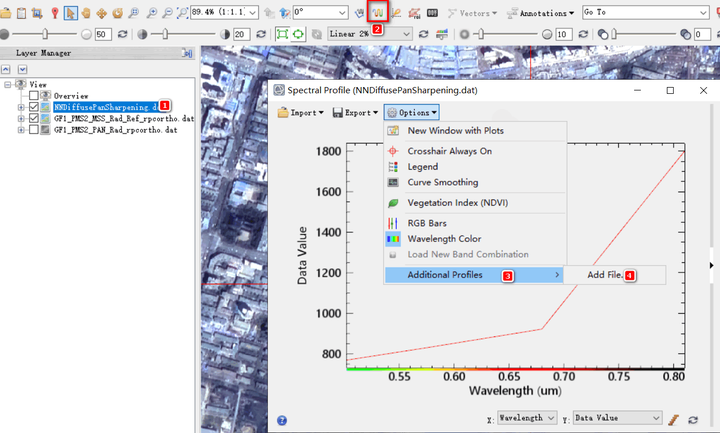
选择多光谱正射纠正后的影像,可导入此影像光谱曲线
两条曲线显示在一个矩形面板中
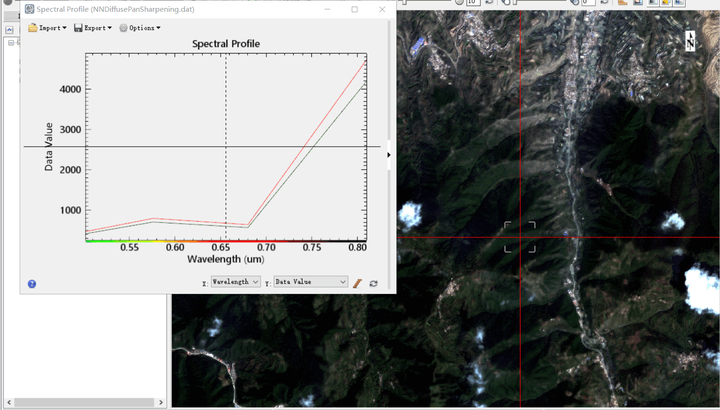
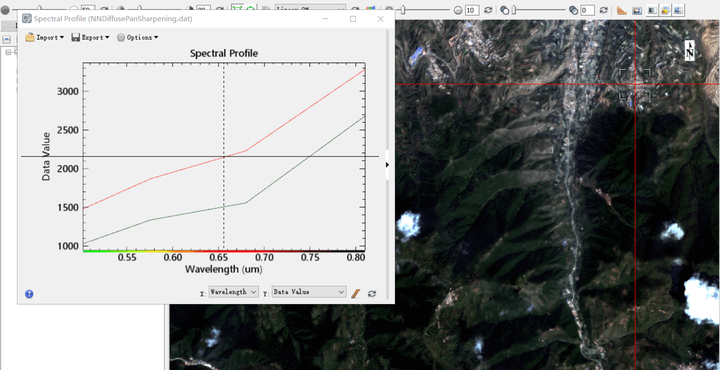
点击城市的某个地方,波谱曲线差别很大
点击植被区域,发现差别很小,融合后影像较低了吸收的光谱曲线
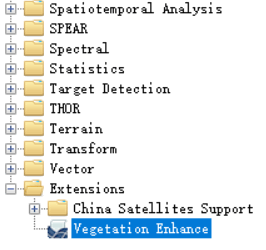
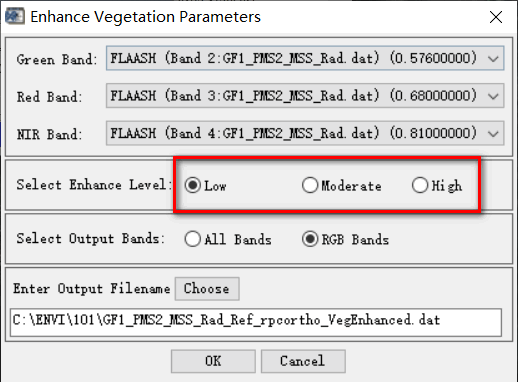
这里再介绍一个植被增强工具(安装的扩展工具)
点击Vegetation Enhance
选择正射纠正的多光谱数据为例(融合图像数据太大)
在植被增强面板中进行设置,这里选择Low增强就可,可以根据需要进行设置
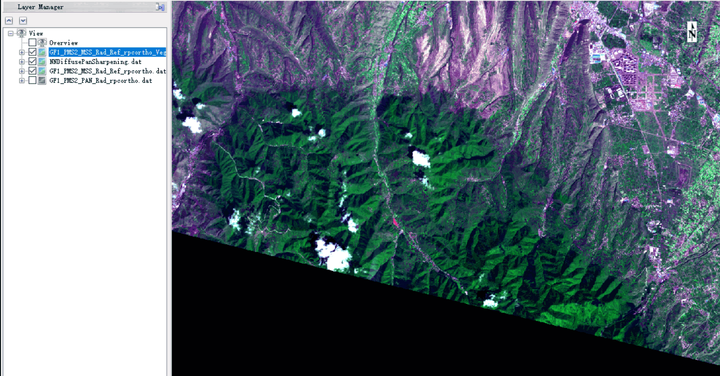
进行植被增强的影像
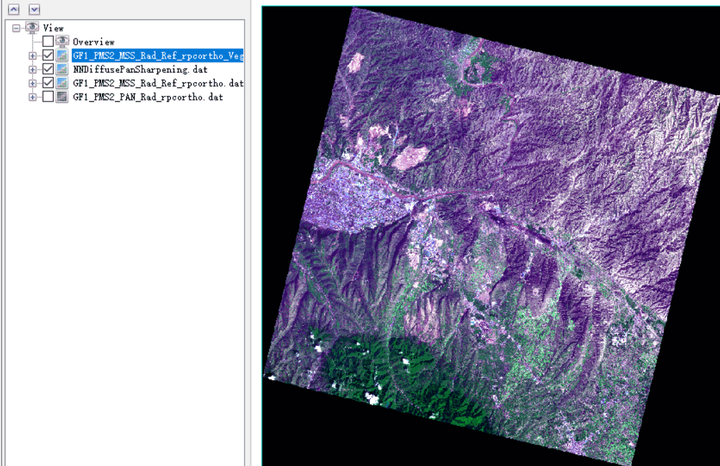
发现已经很明显提取出来了影像的植被
原理:NIR*0.2+green*0.8
进行植被增强和没有增强的多光谱正射纠正的影像对比